Redmine Service
To enable the Redmine integration in a project, navigate to the Integrations page, click the Redmine service, and fill in the required details on the page as described in the table below.
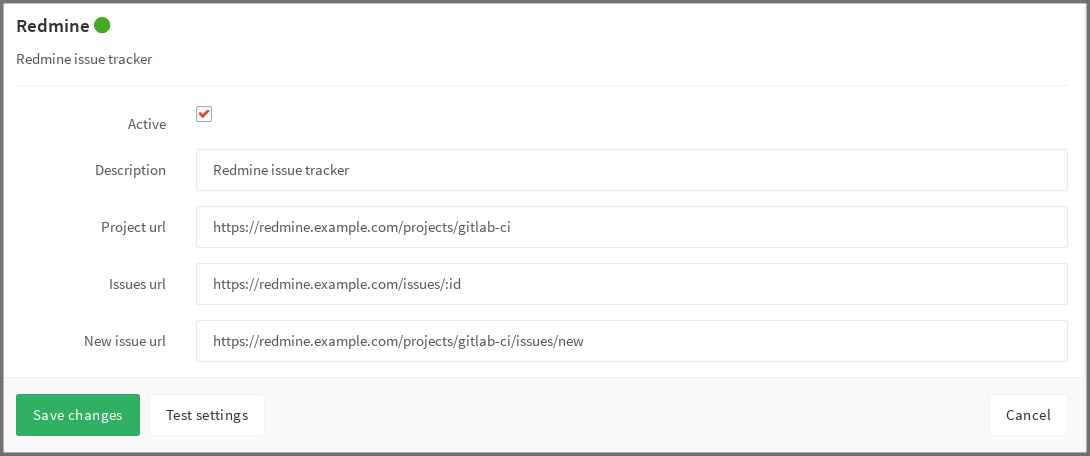
| Field | Description |
|---|---|
description |
A name for the issue tracker (to differentiate between instances, for example) |
project_url |
The URL to the project in Redmine which is being linked to this GitLab project |
issues_url |
The URL to the issue in Redmine project that is linked to this GitLab project. Note that the issues_url requires :id in the URL. This ID is used by GitLab as a placeholder to replace the issue number. |
new_issue_url |
This is the URL to create a new issue in Redmine for the project linked to this GitLab project |
Once you have configured and enabled Redmine:
- the Issues link on the GitLab project pages takes you to the appropriate Redmine issue index
- clicking New issue on the project dashboard creates a new Redmine issue
As an example, below is a configuration for a project named gitlab-ci.
Referencing issues in Redmine
Issues in Redmine can be referenced in two alternative ways:
-
#<ID>where<ID>is a number (example#143) -
<PROJECT>-<ID>where<PROJECT>starts with a capital letter which is then followed by capital letters, numbers or underscores, and<ID>is a number (exampleAPI_32-143).
Please note that <PROJECT> part is ignored and links always point to the
address specified in issues_url.